Changing Fork Springs and Oil
OK, my specimen for this is my 1998 KDX
200.
Objective: Change out fork springs for springs of my weight, and change
the oil because I don't know when it was done last if ever on the bike I bought
used.
Background Info. After reading the many threads on DirtRider.net I became
convinced that the stock springs in my bike were going to be too soft for my
heavy arse. So I ordered up a pair of springs for my weight. I was
told by Fredette (or whom ever was on the phone that it was a simple job and
that a monkey could do it). OK so my springs arrive, I have a service
manual and it goes through the fork chapter telling you all about rebuilding
them. The steps to replace the springs in the manual are: 1) prop up the
bike, 2) remove top fork cap 3) swap out springs.
Sounds simple eh ? Well I propped up my
bike, remove the bars ( to get the cap) remove the cap, pushed the fork up and
all kinds of goodies were sticking out. Being new at this, I didn't know
what I was looking at. Hrms, doesn't look like the picture in the manual,
so I put it all back together and posted on DirtRider.net looking for help.
I got that help. I was also then convinced
through this help to take the forks off the bike and change the fork oil.
Now it appears there are 3 ways to do this.
- The book recommends a fork oil measuring too,
special tool number blah-h-2-blah-4-cky. I looked around I don't have
one of those. There are instructions to make one on Just KDX.
That too looked too complicated to me. So I started asking around.
- The second way is to drain the fork and use a
tape measure with millimeters on it and fill it up to a certain point.
Again I looked around, I don't have such a tape measure.
- The 3rd option was to drain them suckers and
simply pour the correct amount in each fork. Now that I can do.
So that's the approach I will take. No it's not exact, but since I
don't race for factory team, hell I don't race at all, it's close enough for
government work.
Since this was a one man job, there aren't as
many photos as I'd have like there to be. Just about when I wanted to take
a certain photos, my hands were covered with Tranny oil (Yes, I used Mobile 1
ATF Synthetic), it's about equivalent of 7wt and was recommended. Or I was
holding things together with both hands. I'll used photos of the manual
below so you can get a feel.
Step 1:
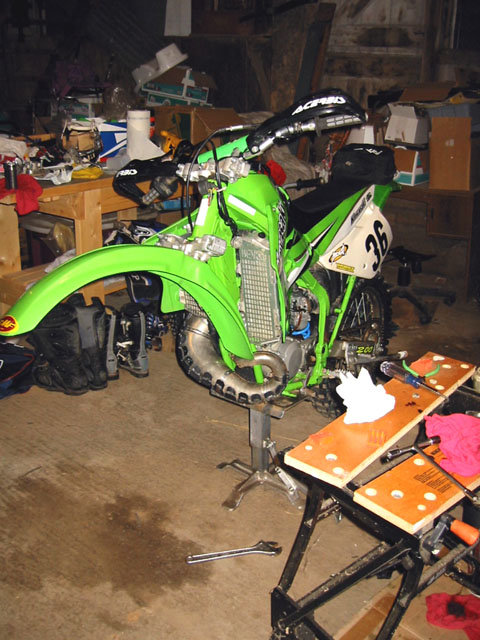
- Prop up the bike on a sturdy stand.
- Remove your number plate/headlight
(this might not be necessary).
- Remove the front wheel. (keep in mind
not to bang, or ding the front rotor). Set it aside.
- Shove something in the Cailper to keep
it open (I used a wooden shim)
- It looks to me that since I'm taking
the forks off the Caliper should come off the fork, so I took that off
too.
|
|
Step 2:
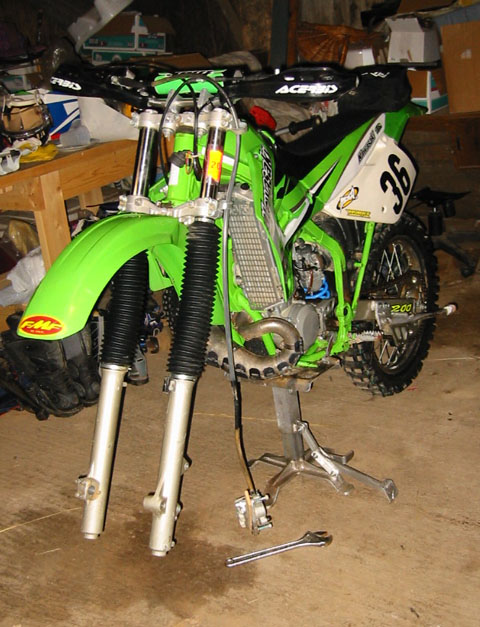
- Remove the Brake Lever with Caliper and
set it aside so you don't hose it up..
- Remove the Handlebars to get some
room. I just removed them via the posts.
- I then opened the screws to release the
air pressure (both forks)
- Loosen the top of the triple clamps
before you attempt to loosen the top caps.
- Loosen the top caps. Unscrew the
all the way. When the seem like they won't come anymore pull on
them, you should see all the internal fork goodies coming out. (this
is a good thing).
- Loosen the bottom triple clamp and
remove one fork at a time and set them aside. You might have to
work them out of the clamp a bit.
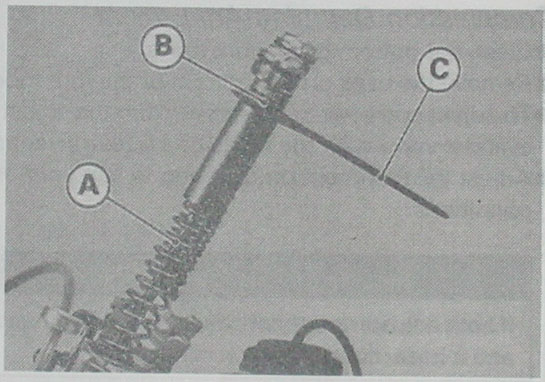
Now the fun begins... |
|
Step 3:
- Compress the upper fork tube and all
the goodies will come out the top.
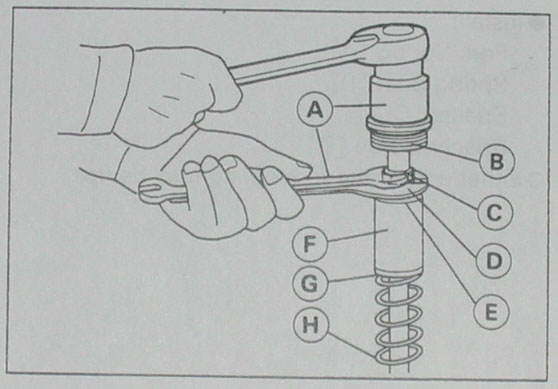
- (A) The spring (kinda obvious I know)
(B) Not sure what the points to :) (C) Another special tool the
spring holder. You need something similar. I was able to
use a small say 7/16th box wrench.
- If you push that spacer down and
compress the spring, you'll see a nut on the inner shaft. You
need to get a hold of the nut.
- Compress the spring and spacer and
stick your version of item (C) under that nut to hold the spring and
spacer out of the way. Put a wrench on that nut and remove the
Cap.
|
|
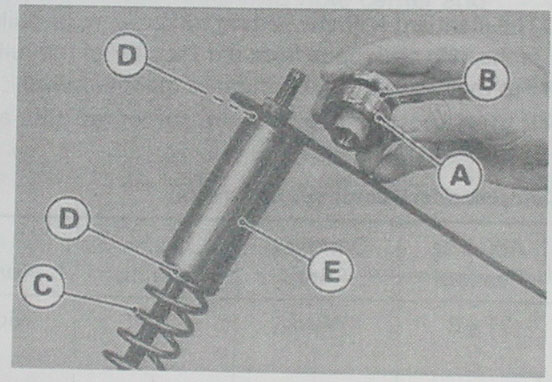
- Slide the spacer and spring off ( there
are two end caps on either end of the spacer.
|
|
- I initially pulled the springs and set
them in this bucked (they will be drenched in oil.
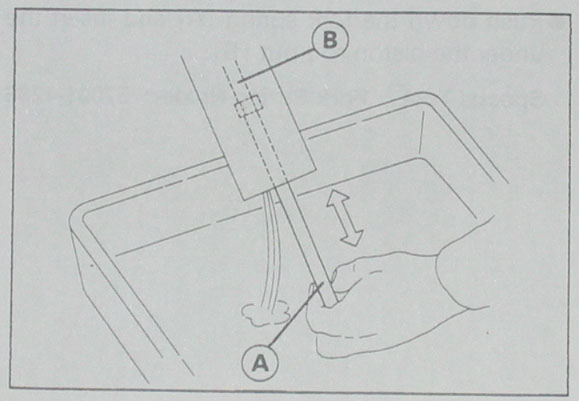
- I then drained the initial fluid from
each fork into this tub as well.
- You need to pull the fork rod back and
forth (manual says 10 times) to get the rest of the oil out.
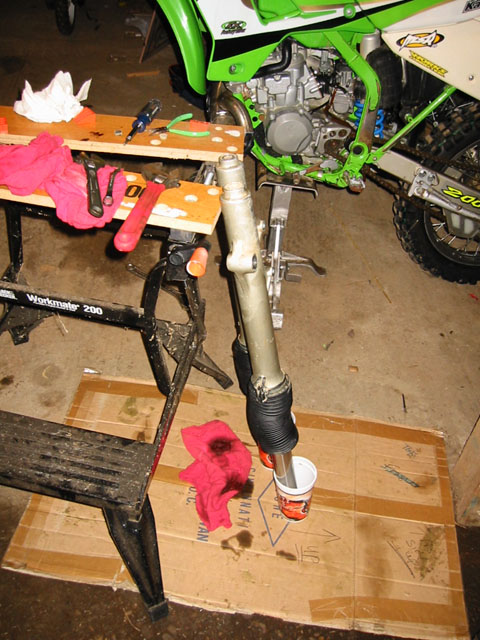
- I then set them upside down to drain
for about an hour into cups.
|
|
Step 4:
Putting it all back together.
- I used the manuals recommended quantity
for a change 550ml I think. Measured it and poured it into each
shock.
- Getting the spring in with only two
hands can be done, but enlist someone if you have someone
available. At 2:00am my son was sleeping.
- Take care to keep the forks clean where
they mount into the triple clamps. I can't imagine lubricant
here would be good.
- Install in the reverse order.
Make sure the top cap is tight but not over torqued. 15ft lbs I
think.
- Make sure the caliper is put back on
tight and pump the brake before you ride it.
|
|
That's
it for this adventure. I'm about to go ride it. If I crash and
burn because of this repair I'll let you know. Comments or
suggestions ? send me a note: matt@dishers.com |